Attribute Module
The attribute module makes it possible to import automatic filters or additional information into the products in your shop.
In Shopware and WooCommerce it is possible to integrate ready-made filter functions into the shop.
These then only have to be activated in the shop system. These are mainly known from large marketplaces such as eBay or Amazon. The customer can find the desired product more quickly through targeted filtering. In addition, the filters can also be assigned to the article characteristics of eBay or Amazon in Magnalister.
Unfortunately, it is currently not possible to import additional information into Gambio because the API interface of the shop system does not allow this.
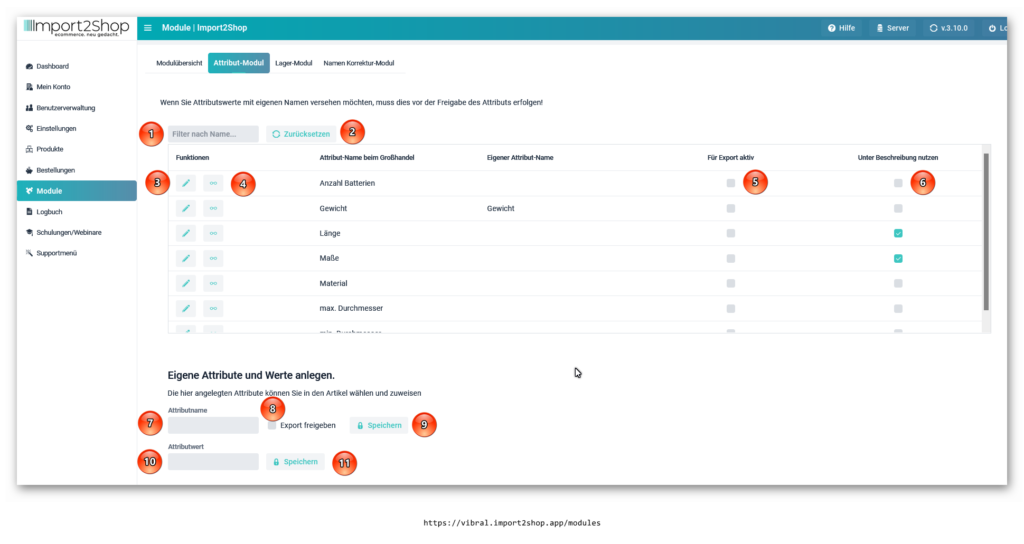
- Filter by Name – Here you can filter attributes by their names.
- Reset – Reset last filters search.
- Pen symbol – rename attribute names (your own attribute name is then taken into account when exporting to the shop system).
- Glasses Icon – Displays all attribute values associated with the attribute name. The values can then be renamed in the new pop-up window (the renamed attribute value is then taken into account when exporting to the shop system).
- Für Export aktiv – Das Attribut mit den Werten bei dem jeweiligen Artikel mit an den Shop übergeben.Bitte beachten Sie, dass Attribute zusätzliche Lasten im Shop sind und der Server, auf dem der Shop liegt, daher genug Leistung benötigt.
- Use under description – The attribute with the values is set as a bullet point under “Additional characteristics” under the description.
Please make sure you have Update name/descriptions enabled in the warehouse and wholesaler settings. After all articles have been updated, you can deactivate this again, otherwise the update times will be longer. - Attribute name – Here you can create your own attribute name. These must then be stored individually in the respective products, see “Assigning your own attributes to the items”.
- Active for export – The attribute with the values for the respective article is also transferred to the shop.
Please note that attributes are additional loads in the shop and the server on which the shop is located therefore needs enough power. - Save – Save the saved settings.
- Attribute value – Here you can create your own attribute values. These must then be stored individually in the respective products, see “Assigning your own attributes to the items”.
- Save – Save the saved settings.
IMPORTANT!
Any changes to the names and values must be made prior to export release.
Create your own attributes and assign them to the articles
If you have created your own attributes and attribute values, they must be assigned to the respective article as follows.
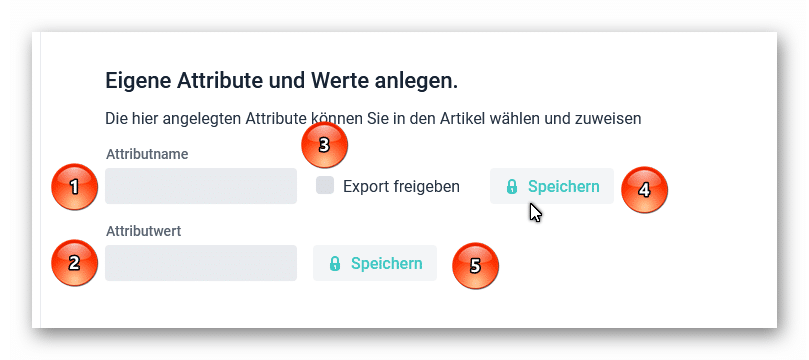
Create your own attributes and values.
First create your own attribute and release it for export.
You can also define your own value; the value can be assigned to any attribute.
- Attribute name – Here you can create your own attribute names. These must then be stored individually in the respective products, see “Assigning your own attributes to the items”.
- Active for export – The attribute with the values for the respective article is also transferred to the shop.
Please note that attributes are additional loads in the shop and the server on which the shop is located therefore needs enough power. - Save – Save the saved settings.
- Attribute value – Here you can create your own attribute values. These must then be stored individually in the respective products, see “Assigning your own attributes to the items”.
- Save – Save the saved settings.
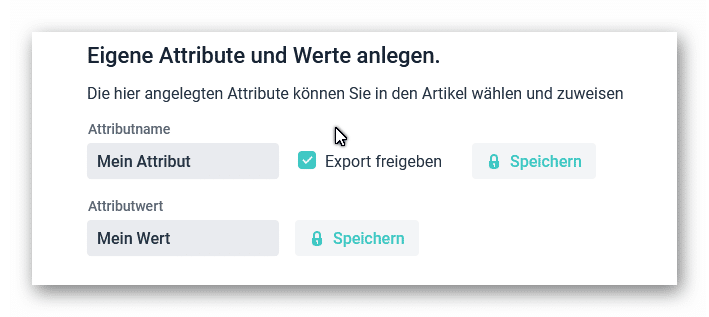
Example own attribute and value
Next, assign your attribute and value to the item you want. Your attribute and value will then be stored for the selected item in your shop.
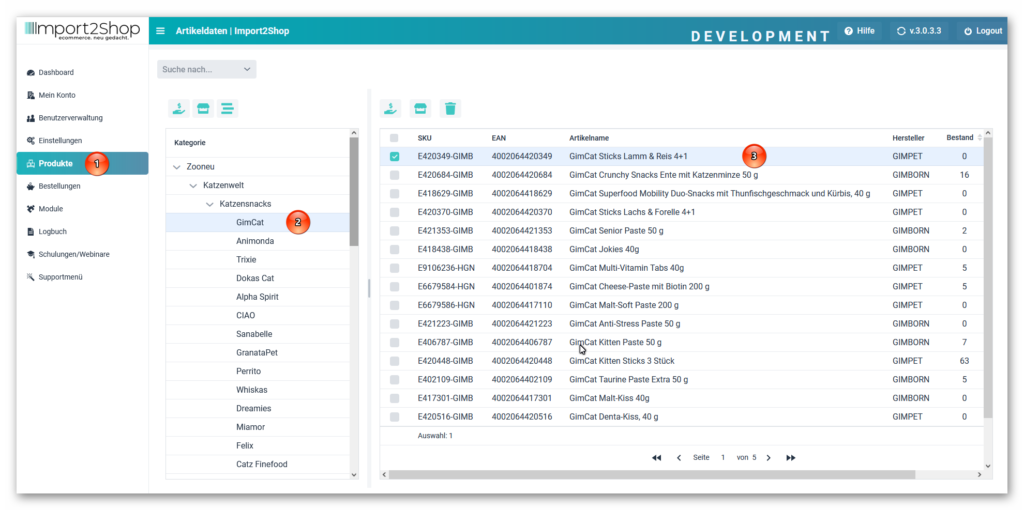
Select item for attribute assignment
- Left navigation on products
- Choose categorie
- select the product you are looking for with a double click
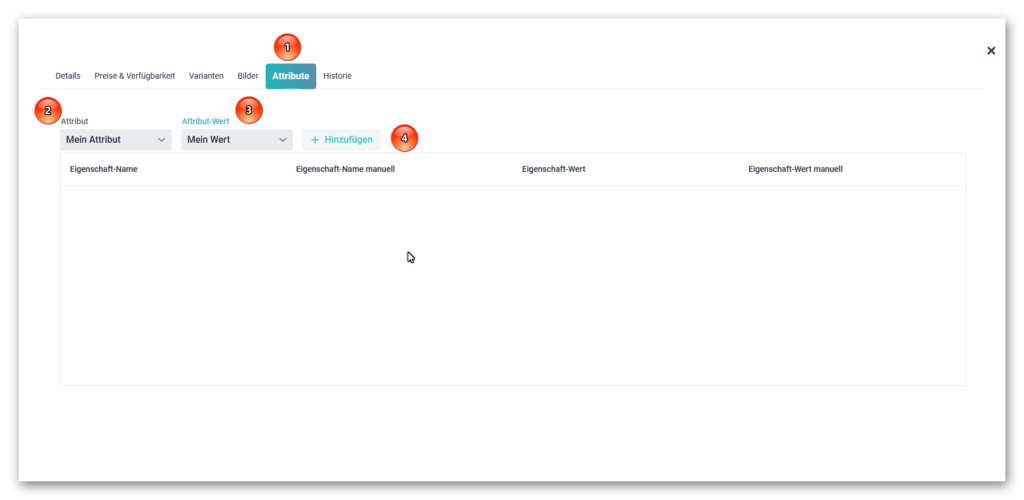
Assign own attribute and own value to the product
- Search for the attribute you have created in the attribute field (you can also search by entering the name).
- In the Value attribute field, search for your created value (you can also search by entering the name).
- Add your selection to the product using the + Add button.
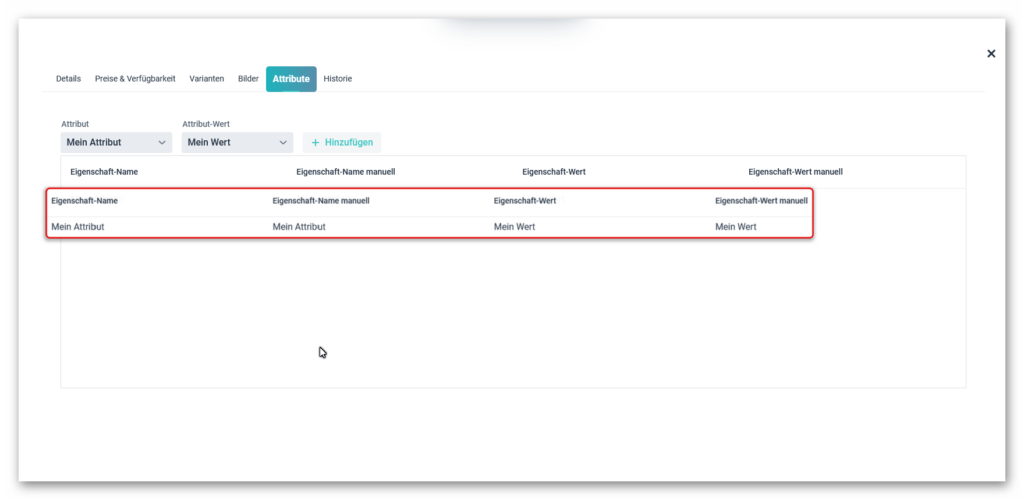
Attribute has been assigned to the product
The attribute and the value were assigned to the product and transferred to your shop with the next shop export.
Important note on the subsequent import of the attributes
If you have booked the attribute module later, the attributes must be imported later. We have a function for this under Settings – Warehouse/Wholesalers.
This only has to be done once for existing products.
For new products that are imported after booking the attribute module, the attributes are automatically present.
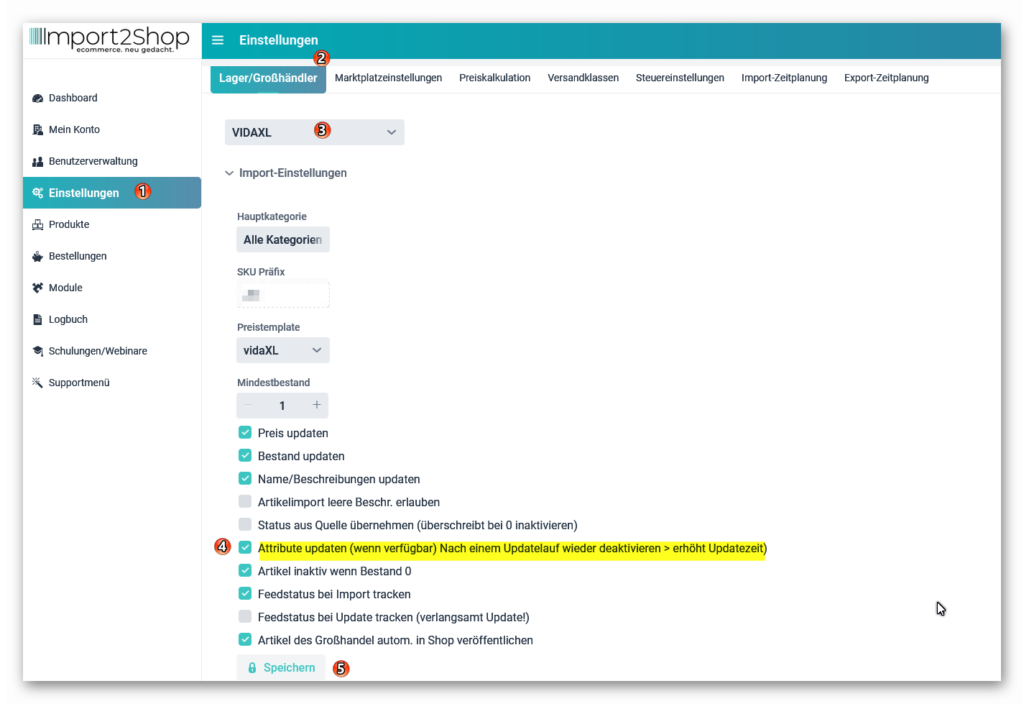
The attributes will be imported with the wholesaler’s next update run.
You should deactivate the function again after the update run.