Hilfe-Center
Shopify
Set up token authentication
Marketplace setting Shopify
Generate a token as described here: Shopify App Connection
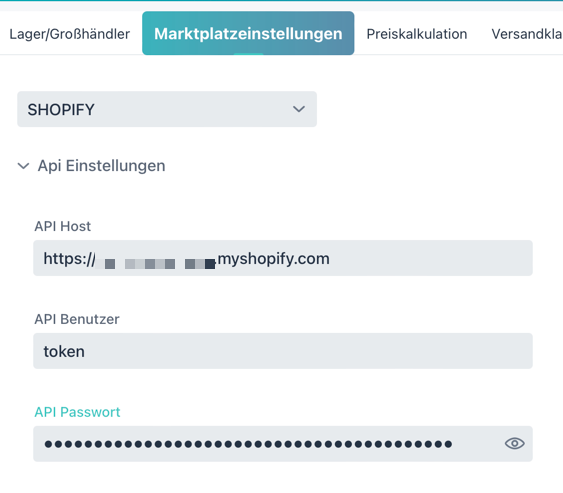
Configuration Import2Shop web app:
- Please enter the token as API password
- As an API user, please enter the word “token” (without quotation marks)
- Please enter your Shopify domain as API host: xxx.myshopify.com (please replace xxx)
- Save the settings in our app.
Special functions
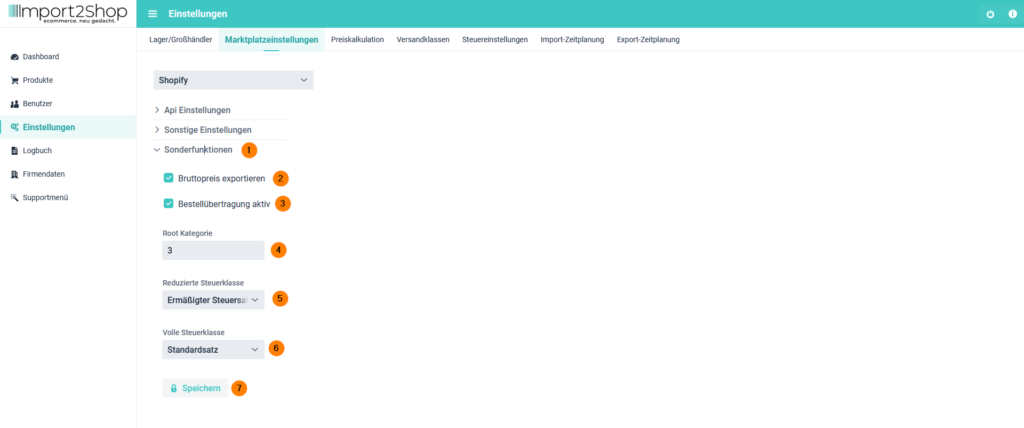
Special Features Shopify
- Special functions (you can access the settings for the special functions via this dropdown menu)
- Import gross prices (when activated, we immediately add the applicable VAT to the sales price) for Shopify, please always use the Export gross prices setting
- Order transmission active (here you can activate / deactivate the order transmission to our system)
- Root category enter your root category ID here, default is always 0
- Reduced tax bracket (choose here which tax rate applies to your reduced tax bracket)
- Full tax bracket (choose here which tax rate applies to your full tax bracket)
- Save (click on this button to save your settings)
Important information for Shopify customers
When importing the items, Import2Shop stores “tags” in the products.
These must not be deleted under any circumstances.
If the product is deleted, it is no longer possible to compare the products